
6SL3356-3AG41-3AA0, 6SL3350-6TK00-0BA0, 6SL3356-6TG41-3AA3 Replacement IPD card Siemens
6SL3356-3AG41-3AA0, 6SL3350-6TK00-0BA0, 6SL3356-6TG41-3AA3 Replacement IPD card Siemens
6SL3356-3AG41-3AA0, 6SL3350-6TK00-0BA0, 6SL3356-6TG41-3AA3 Replacement IPD card Siemens
6SL33563AG413AA0 | 6SL33563AG413AA0
Product
Image similar
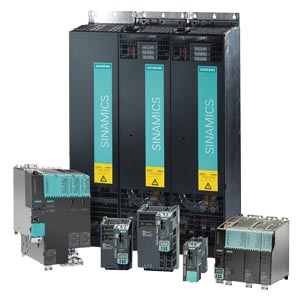
*Spare part* SINAMICS S120 Replacement IPD card for liquid-cooled Motor Module 1200 kW 500-690V 3AC, 50/60 Hz, 1270A
Notes
.
.
List Price Show prices
Customer Price Show prices
Additional Services
For this product we can offer Services like Spare Part Delivery/Repair/Exchange. You have currently no rights to enter the Service Web Shop for that. For further information & to order this service, please contact your local Spares&Repair Partner
Service & Support (Manuals, Certificates, FAQs...) Download
Image gallery and data for M-CAD and E-CAD (1) (1)
Product data Further Product Information
Product
Article Number (Market Facing Number) 6SL33563AG413AA0 | 6SL33563AG413AA0
Product Description *Spare part* SINAMICS S120 Replacement IPD card for liquid-cooled Motor Module 1200 kW 500-690V 3AC, 50/60 Hz, 1270A
Product family Ordering Data Overview
Product Lifecycle (PLM) PM300:Active Product
Notes
.
.
Price data
Price Group R52
List Price Show prices
Customer Price Show prices
Metal Factor None
Delivery information
Export Control Regulations AL : N / ECCN : EAR99H
Standard lead time ex-works 10 Day/Days
Net Weight (lb) 0.353 lb
Package size unit of measure Not available
Quantity Unit 1 Piece
Packaging Quantity 1
Additional Product Information
EAN Not available
UPC 887621270155
Commodity Code 85049090
LKZ_FDB/ CatalogID D21.3LD
Product Group 4929
Group Code R2S7
Country of origin Germany
Compliance with the substance restrictions according to RoHS directive not available
Returnable No
WEEE (2012/19/EU) Take-Back Obligation No
REACH Art. 33 Duty to inform according to the current list of candidates
Reach Information
Sinamics__________________________________________________________________________________________Author: I DT LD I D11, A.MeyerStatus: July. 2012A5E02891217AService on Sinamics convertersInstructions for replacing/updating the power unit control electronics (CIB/CIM)Valid for thedrive unittypes:Sinamics S120 chassis formatSinamics S150Sinamics G150Sinamics G130Notes:Before you start the upgrade, read the prerequisites for the upgradein Section I.The required resources for an upgrade are summarized in Section II.You must observe the safety instructions in the Operating Instructions!- 1 -
Page 2
Sinamics__________________________________________________________________________________________Author: I DT LD I D11, A.MeyerStatus: July. 2012A5E02891217AContents:I. Hardware – prerequisites and general informationa.)Control Unit CU320 versionb.)Notesc.)Revisions/AuthorII. Required spare parts/toolsa.)Toolsb.)Replacing the control electronics module CIB with CIMIII. Replacing the control electronics with a new version (replacing CIB withCIM)a.)Preparatory steps:b.)Replacing the control board (CIB with CIM)c.)Recommissioning 500 V + 690 V devicesIV. Replacing the new control electronics module (CIM with CIM)V. Connector layout on the control electronics modulea.)Connector layout on old CIB:b.)Connector layout on new CIM:c.)Assignment order numbers CIM and IPD:- 2 -
Page 3
Sinamics__________________________________________________________________________________________Author: I DT LD I D11, A.MeyerStatus: July. 2012A5E02891217AI. Hardware – prerequisites and general informationa.) Control Unit CU320 versionFirmware Versions from V2.4 require a Control Unit CU320, Version C or higher.You can check the version of your Control Unit CU320 on the type plate of the ControlUnit CU320:Rating plateAbbreviated rating platewith order number andversionFig. 1: CU320: Type plate with version data- 3 -
Page 4
Sinamics__________________________________________________________________________________________Author: I DT LD I D11, A.MeyerStatus: July. 2012A5E02891217Ab.) NotesIt is not necessary to backup the parameters using the Starter when replacing the con-trol electronics module.For 500 V or 690 V devices, it is also important to observe III.c.). It may be necessaryto use the STARTER tool, version V4.1.5 or higher.All of the old control electronics boards (CIB) must be replaced by the new ver-sions (CIM) in units for parallel connection!In the software 2.6.x.
Page 5
Sinamics__________________________________________________________________________________________Author: I DT LD I D11, A.MeyerStatus: July. 2012A5E02891217AII. Required spare parts/toolsa.) Tools- Torx screwdriver set with extension (socket case)- Flat-bladed screwdriver (for bus connector)- Anti-static shoes and/or ground wristband to prevent static charges- Side cutting pliers- Cable ties, smallb.) Replacing the control electronics module CIB with CIM- CIM module with order no. 6SL3350-6TK00-0xA0 (x stands for: E = air-cooled,B = liquid-cooled power units)- IPD metallic connector (depending on type of device, output and voltage)- New plastic connectors are delivered with the replacement module.The order numbers for the new CIM module and the suitable IPD connector arelisted in chapter V.c.).- 5 -
Page 6
Sinamics__________________________________________________________________________________________Author: I DT LD I D11, A.MeyerStatus: July. 2012A5E02891217AIII. Replacing the control electronics with a new version(replacing CIB with CIM)a.) Preparatory steps:1. Switch off the main voltage and control voltage. Notice: If the converter has aPROFIBUS connection, and it is the last station on the bus, the entire bus mayexhibit a fault when the converter is switched off. In this case, the setting of thebus terminator switch must be changed on the predecessor (red slider switchon the connector).2. Where necessary, remove the EMC shielding panel at the power block (de-ployment and size depend on the output).3. If necessary, remove the CU320. The CU is mounted on a support plate that isfastened to the frame on the side above the CU (yellow mark in Fig. 2). Thecontrol electronics module is "concealed" behind the CU320 in most cases. La-bel the connectors on the CU module prior to removal (-X122; -X132). The des-ignations are stamped onto the plate. Remove the fastening screw from thesupport plate.4. Loosen the bus connector and remove the connector from the CU. The DRIVE-CLiQ connections (gray cables, X100 – X103) are not coded and must be la-belled.- 6 -
Page 7
Sinamics__________________________________________________________________________________________Author: I DT LD I D11, A.MeyerStatus: July. 2012A5E02891217AFig. 2: Removing the CU320 with support plateb.) Replacing the control board (CIB with CIM)Some connector designs are compatible with the old modules. They only need to bereconnected. Connectors that must be changed are described in the steps below.- 7 -
Page 8
Sinamics__________________________________________________________________________________________Author: I DT LD I D11, A.MeyerStatus: July. 2012A5E02891217A1. Remove the two fastening screws (with yellow marks in Fig. 3) on the supportplate of the control electronics module.Fig. 3: Support plate with old control electronics module (CIB)2. Slowly withdraw the control electronics slide-in unit. Remove the connectorsone-by-one during the process. Make sure that no cables get caught below thesupport plate. Note the appearance and positions of the connectors X41 and- 8 -
Page 9
Sinamics__________________________________________________________________________________________Author: I DT LD I D11, A.MeyerStatus: July. 2012A5E02891217AX42 (see Fig. 3), since these are changed later. The connectors are labelledand also coded. This makes it difficult to interchange them. The fiber-optic ca-bles must not be kinked! The DRIVE-CLiQ connections (gray cables, X400 –X402) are not coded and must be labelled.3. Changing the X42 connector. The new X42 connector has only 4 poles. Thenew connector is located on the replacement module. Reconnection: (order forX42 old to X42 new). Pin 5 -> Pin 3, Pin 6 -> Pin 1, Pin 7 -> Pin 4, Pin 8 -> Pin2.4. Changing the X41 connector. The X41 connector is coded on the new controlelectronics module (red lugs in the socket). Remove one "lug" in the connectorsocket using a knife.5. Connecting and fastening the 9-pin sub-D current transformer connector in soc-ket X43 of the cast-metal connector (IPD module).Fig. 4: IPD connector6. Changing connectors X31 + X32. (black in-line connectors below the fiber-opticconnectors.)7. Insert the new control electronics module. The position of the X41 connector(on the front panel) has been changed slightly in the new design. So it may benecessary to undo the cable harness a little and pull out the appropriate wires.- 9 -
Page 10
Sinamics__________________________________________________________________________________________Author: I DT LD I D11, A.MeyerStatus: July. 2012A5E02891217AFig. 5: New control electronics (CIM)8. Reinstalling the CU320.9. Reapply the control voltage of the converter. The two LEDs of the CIM and onthe CU may start to flash. In this case, the converter automatically performs asoftware update for the individual components (as of V2.5). This is indicatedthrough green-read flashing of the LED on the affected component (in this casethe CIM) and through slow orange flashing of the RDY-LED on the CU. It cantake some time (up to 15 minutes per power unit) to load the new firmware intothe components. After the upgrade procedure, the RDY-LED of the CU flashesquickly with an orange light. After this, switch the voltage off and on again andreboot. With the G150, the AOP indicates that a power-on reset is required.- 10 -
Page 11
Sinamics__________________________________________________________________________________________Author: I DT LD I D11, A.MeyerStatus: July. 2012A5E02891217Ac.) Recommissioning 500 V + 690 V devicesThe 500 V + 690 V device series was replaced by 500 - 690 V wide voltage de-vices in the course of development. If the converter incorporated 500 V or 690 Vcontrol electronics, it is now necessary to adapted some parameters.After the electronics power supply is turned on, the drive powers up. The RDY-LEDon the CU and the replaced control electronics light up orange. The STARTER toolor the AOP must now be used to change the following parameters in sequence inthe the expert list of the CU:1. p9 = 1 (Device configuration)2. p9906 = 3 (Minimum: Compares the component class)3. p9 = 0 (ready).4. p977 = 1 (Save in non-volatile memory - downloaded at POWER ON)Then, the LEDs of the components affected changed back to green and the con-verter is operable again.The project in the drive retains its original status, except for the modified parame-ters; this means that the power unit data of the old module are displayed when yougo online.- 11 -
Page 12
Sinamics__________________________________________________________________________________________Author: I DT LD I D11, A.MeyerStatus: July. 2012A5E02891217AIV. Replacing the new control electronics module (CIMwith CIM)Performing steps III.a.). The replacement described in step III.b.) is carried out withoutsteps 3-5.- 12 -
Page 13
Sinamics__________________________________________________________________________________________Author: I DT LD I D11, A.MeyerStatus: July. 2012A5E02891217AV. Connector layout on the control electronics modulea.) Connector layout on old CIB:Fig. 6: Connector assignment, front view of old control electronics module (CIB)- 13 -
Page 14
Sinamics__________________________________________________________________________________________Author: I DT LD I D11, A.MeyerStatus: July. 2012A5E02891217AFig. 7: Connector assignment, side view of old control electronics module (CIB)- 14 -
Page 15
Sinamics__________________________________________________________________________________________Author: I DT LD I D11, A.MeyerStatus: July. 2012A5E02891217Ab.) Connector layout on new CIM:Fig. 8: Connector assignment, front view of new control electronics module(CIM)- 15 -
Page 16
Sinamics__________________________________________________________________________________________Author: I DT LD I D11, A.MeyerStatus: July. 2012A5E02891217AFig. 9: Connector assignment, side view of new control electronics module (CIM)- 16 -
Page 17
Sinamics__________________________________________________________________________________________Author: I DT LD I D11, A.MeyerStatus: July. 2012A5E02891217Ac.) Assignment order numbers CIM and IPD:The old control electronic (CIB) will be replaced by the new (CIM) and the power unitdependend IPD-card.MLFB CIBMLFB CIMMLFB IPD6SL3351-6GE32-1AB3, 6SL3350-6TK00-0EA0, 6SL3351-3AE32-1DB0, 6SL3351-6GE32-6AB3, 6SL3350-6TK00-0EA0, 6SL3351-3AE32-6DB0, 6SL3351-6GE33-1AB3, 6SL3350-6TK00-0EA0, 6SL3351-3AE33-1DB0, 6SL3351-6GE33-8AB3, 6SL3350-6TK00-0EA0, 6SL3351-3AE33-8DB0, 6SL3351-6GE35-0AB3, 6SL3350-6TK00-0EA0, 6SL3351-3AE35-0DB0, 6SL3351-6GE36-1AB3, 6SL3350-6TK00-0EA0, 6SL3351-3AE36-1DB0, 6SL3351-6GE37-5AB3, 6SL3350-6TK00-0EA0, 6SL3351-3AE37-5DB0, 6SL3351-6GE38-4AB3, 6SL3350-6TK00-0EA0, 6SL3351-3AE38-4DB0, 6SL3351-6GE41-0AB3, 6SL3350-6TK00-0EA0, 6SL3351-3AE41-0DB0, 6SL3351-6GF31-8AB3, 6SL3350-6TK00-0EA0, 6SL3351-3AF31-8DB0, 6SL3351-6GF32-2AB3, 6SL3350-6TK00-0EA0, 6SL3351-3AF32-2DB0, 6SL3351-6GF32-6AB3, 6SL3350-6TK00-0EA0, 6SL3351-3AF32-6DB0, 6SL3351-6GF33-3AB3, 6SL3350-6TK00-0EA0, 6SL3351-3AF33-3DB0, 6SL3351-6GF34-1AB3, 6SL3350-6TK00-0EA0, 6SL3351-3AF34-1DB0, 6SL3351-6GF34-7AB3, 6SL3350-6TK00-0EA0, 6SL3351-3AF34-7DB0, 6SL3351-6GF35-8AB3, 6SL3350-6TK00-0EA0, 6SL3351-3AF35-8DB0, 6SL3351-6GF37-4AB3, 6SL3350-6TK00-0EA0, 6SL3351-3AF37-4DB0, 6SL3351-6GF38-1AB3, 6SL3350-6TK00-0EA0, 6SL3351-3AF38-1DB0, 6SL3351-6GH28-5AB3, 6SL3350-6TK00-0EA0, 6SL3351-3AH28-5DB0, 6SL3351-6GH31-0AB3, 6SL3350-6TK00-0EA0, 6SL3351-3AH31-0DB0, 6SL3351-6GH31-2AB3, 6SL3350-6TK00-0EA0, 6SL3351-3AH31-2DB0, 6SL3351-6GH31-5AB3, 6SL3350-6TK00-0EA0, 6SL3351-3AH31-5DB0, 6SL3351-6GH31-8AB3, 6SL3350-6TK00-0EA0, 6SL3351-3AH31-8DB0, 6SL3351-6GH32-2AB3, 6SL3350-6TK00-0EA0, 6SL3351-3AH32-2DB0, 6SL3351-6GH32-6AB3, 6SL3350-6TK00-0EA0, 6SL3351-3AH32-6DB0, 6SL3351-6GH33-3AB3, 6SL3350-6TK00-0EA0, 6SL3351-3AH33-3DB0, 6SL3351-6GH34-1AB3, 6SL3350-6TK00-0EA0, 6SL3351-3AH34-1DB0, 6SL3351-6GH34-7AB3, 6SL3350-6TK00-0EA0, 6SL3351-3AH34-7DB0, 6SL3351-6GH35-8AB3, 6SL3350-6TK00-0EA0, 6SL3351-3AH35-8DB0, 6SL3351-6GH37-4AB3, 6SL3350-6TK00-0EA0, 6SL3351-3AH37-4DB0, 6SL3351-6GH38-1AB3, 6SL3350-6TK00-0EA0, 6SL3351-3AH38-1DB0, 6SL3352-6TE36-1AA3, 6SL3350-6TK00-0EA0, 6SL3352-3AE36-1AA0, 6SL3352-6TE37-5AA3, 6SL3350-6TK00-0EA0, 6SL3352-3AE37-5AA0, 6SL3352-6TE38-4AA3, 6SL3350-6TK00-0EA0, 6SL3352-3AE38-4AA0, 6SL3352-6TE41-0AA3, 6SL3350-6TK00-0EA0, 6SL3352-3AE41-0AA0, 6SL3352-6TE41-2AA3, 6SL3350-6TK00-0EA0, 6SL3352-3AE41-2AA0, 6SL3352-6TE41-4AA3, 6SL3350-6TK00-0EA0, 6SL3352-3AE41-4AA0, 6SL3352-6TG28-5AA3, 6SL3350-6TK00-0EA0, 6SL3352-3AG28-5AC0, 6SL3352-6TG31-0AA3, 6SL3350-6TK00-0EA0, 6SL3352-3AG31-0AC0, 6SL3352-6TG31-2AA3, 6SL3350-6TK00-0EA0, 6SL3352-3AG31-2AC0, 6SL3352-6TG31-5AA3, 6SL3350-6TK00-0EA0, 6SL3352-3AG31-5AC0, - 17 -
Page 18
Sinamics__________________________________________________________________________________________Author: I DT LD I D11, A.MeyerStatus: July. 2012A5E02891217A6SL3352-6TG31-8AA3, 6SL3350-6TK00-0EA0, 6SL3352-3AG31-8AC0, 6SL3352-6TG32-2AA3, 6SL3350-6TK00-0EA0, 6SL3352-3AG32-2AC0, 6SL3352-6TG32-6AA3, 6SL3350-6TK00-0EA0, 6SL3352-3AG32-6AC0, 6SL3352-6TG33-3AA3, 6SL3350-6TK00-0EA0, 6SL3352-3AG33-3AC0, 6SL3352-6TG34-1AA3, 6SL3350-6TK00-0EA0, 6SL3352-3AG34-1AA0, 6SL3352-6TG34-7AA3, 6SL3350-6TK00-0EA0, 6SL3352-3AG34-7AA0, 6SL3352-6TG35-8AA3, 6SL3350-6TK00-0EA0, 6SL3352-3AG35-8AA0, 6SL3352-6TG37-4AA3, 6SL3350-6TK00-0EA0, 6SL3352-3AG37-4AA0, 6SL3352-6TG38-1AA3, 6SL3350-6TK00-0EA0, 6SL3352-3AG38-1AA0, 6SL3352-6TG38-8AA3, 6SL3350-6TK00-0EA0, 6SL3352-3AG38-8AB0, 6SL3352-6TG41-0AA3, 6SL3350-6TK00-0EA0, 6SL3352-3AG41-0AB0, 6SL3352-6TG41-3AA3, 6SL3350-6TK00-0EA0, 6SL3352-3AG41-3AB0, 6SL3352-6TH28-5AA3, 6SL3350-6TK00-0EA0, 6SL3352-3AG28-5AC0, 6SL3352-6TH31-0AA3, 6SL3350-6TK00-0EA0, 6SL3352-3AG31-0AC0, 6SL3352-6TH31-2AA3, 6SL3350-6TK00-0EA0, 6SL3352-3AG31-2AC0, 6SL3352-6TH31-5AA3, 6SL3350-6TK00-0EA0, 6SL3352-3AG31-5AC0, 6SL3352-6TH31-8AA3, 6SL3350-6TK00-0EA0, 6SL3352-3AG31-8AC0, 6SL3352-6TH32-2AA3, 6SL3350-6TK00-0EA0, 6SL3352-3AG32-2AC0, 6SL3352-6TH32-6AA3, 6SL3350-6TK00-0EA0, 6SL3352-3AG32-6AC0, 6SL3352-6TH33-3AA3, 6SL3350-6TK00-0EA0, 6SL3352-3AG33-3AC0, 6SL3352-6TH34-1AA3, 6SL3350-6TK00-0EA0, 6SL3352-3AG34-1AA0, 6SL3352-6TH34-7AA3, 6SL3350-6TK00-0EA0, 6SL3352-3AG34-7AA0, 6SL3352-6TH35-8AA3, 6SL3350-6TK00-0EA0, 6SL3352-3AG35-8AA0, 6SL3352-6TH37-4AA3, 6SL3350-6TK00-0EA0, 6SL3352-3AG37-4AA0, 6SL3352-6TH38-1AA3, 6SL3350-6TK00-0EA0, 6SL3352-3AG38-1AA0, 6SL3352-6TH38-8AA3, 6SL3350-6TK00-0EA0, 6SL3352-3AG38-8AA0, 6SL3352-6TH41-0AA3, 6SL3350-6TK00-0EA0, 6SL3352-3AG41-0AA0, 6SL3352-6TH41-3AA3, 6SL3350-6TK00-0EA0, 6SL3352-3AG41-3AA0, 6SL3353-6TE35-5CA3, 6SL3350-6TK00-0EA0, 6SL3353-3AE35-5CA0, 6SL3353-6TE36-1AA3, 6SL3350-6TK00-0EA0, 6SL3353-3AE36-1AA0, 6SL3353-6TE37-3CA3, 6SL3350-6TK00-0EA0, 6SL3353-3AE37-3CA0, 6SL3353-6TE37-5AA3, 6SL3350-6TK00-0EA0, 6SL3353-3AE37-5AA0, 6SL3353-6TE38-2BA3, 6SL3350-6TK00-0EA0, 6SL3353-3AE38-2BA0, 6SL3353-6TE38-4AA3, 6SL3350-6TK00-0EA0, 6SL3353-3AE38-4AA0, 6SL3353-6TE41-0AA3, 6SL3350-6TK00-0EA0, 6SL3353-3AE41-0AA0, 6SL3353-6TE41-1CA3, 6SL3350-6TK00-0EA0, 6SL3353-3AE41-1CA0, 6SL3353-6TE41-2AA3, 6SL3350-6TK00-0EA0, 6SL3353-3AE41-2AA0, 6SL3353-6TE41-2BA3, 6SL3350-6TK00-0EA0, 6SL3353-3AE41-2BA0, 6SL3353-6TE41-3CA3, 6SL3350-6TK00-0EA0, 6SL3353-3AE41-3CA0, 6SL3353-6TE41-4AA3, 6SL3350-6TK00-0EA0, 6SL3353-3AE41-4AA0, 6SL3353-6TE41-5BA3, 6SL3350-6TK00-0EA0, 6SL3353-3AE41-5BA0, 6SL3353-6TE41-7CA3, 6SL3350-6TK00-0EA0, 6SL3353-3AE41-7CA0, 6SL3353-6TE41-8BA3, 6SL3350-6TK00-0EA0, 6SL3353-3AE41-8BA0, 6SL3353-6TG31-4AA3, 6SL3350-6TK00-0EA0, 6SL3353-3AG31-4AB0, 6SL3353-6TG33-1AA3, 6SL3350-6TK00-0EA0, 6SL3353-3AG33-1AB0, 6SL3353-6TG35-5CA3, 6SL3350-6TK00-0EA0, 6SL3353-3AG35-5CA0, 6SL3353-6TG35-8AA3, 6SL3350-6TK00-0EA0, 6SL3353-3AG35-8AA0, - 18 -
Page 19
Sinamics__________________________________________________________________________________________Author: I DT LD I D11, A.MeyerStatus: July. 2012A5E02891217A6SL3353-6TG37-4AA3, 6SL3350-6TK00-0EA0, 6SL3353-3AG37-4AA0, 6SL3353-6TG38-8CA3, 6SL3350-6TK00-0EA0, 6SL3353-3AG38-8CA0, 6SL3353-6TG41-0AA3, 6SL3350-6TK00-0EA0, 6SL3353-3AG41-0AA0, 6SL3353-6TG41-2CA3, 6SL3350-6TK00-0EA0, 6SL3353-3AG41-2CA0, 6SL3353-6TG41-3AA3, 6SL3350-6TK00-0EA0, 6SL3353-3AG41-3AA0, 6SL3353-6TG41-7CA3, 6SL3350-6TK00-0EA0, 6SL3353-3AG41-7CA0, 6SL3353-6TH31-4AA3, 6SL3350-6TK00-0EA0, 6SL3353-3AG31-4AB0, 6SL3353-6TH33-1AA3, 6SL3350-6TK00-0EA0, 6SL3353-3AG33-1AB0, 6SL3353-6TH34-3BA3, 6SL3350-6TK00-0EA0, 6SL3353-3AG34-3BA0, 6SL3353-6TH35-8AA3, 6SL3350-6TK00-0EA0, 6SL3353-3AG35-8AA0, 6SL3353-6TH36-8BA3, 6SL3350-6TK00-0EA0, 6SL3353-3AG36-8BA0, 6SL3353-6TH37-4AA3, 6SL3350-6TK00-0EA0, 6SL3353-3AG37-4AA0, 6SL3353-6TH41-0AA3, 6SL3350-6TK00-0EA0, 6SL3353-3AG41-0AA0, 6SL3353-6TH41-1BA3, 6SL3350-6TK00-0EA0, 6SL3353-3AG41-1BA0, 6SL3353-6TH41-3AA3, 6SL3350-6TK00-0EA0, 6SL3353-3AG41-3AA0, 6SL3353-6TH41-4BA3, 6SL3350-6TK00-0EA0, 6SL3353-3AG41-4BA0, 6SL3353-6TH41-8BA3, 6SL3350-6TK00-0EA0, 6SL3353-3AG41-8BA0, 6SL3355-6TE32-1AA3, 6SL3350-6TK00-0BA0, 6SL3355-3AE32-1AA0, 6SL3355-6TE32-6AA3, 6SL3350-6TK00-0BA0, 6SL3355-3AE32-6AA0, 6SL3355-6TE33-1AA3, 6SL3350-6TK00-0BA0, 6SL3355-3AE33-1AA0, 6SL3355-6TE35-0AA3, 6SL3350-6TK00-0BA0, 6SL3355-3AE35-0AA0, 6SL3356-6TE32-1AA3, 6SL3350-6TK00-0BA0, 6SL3356-3AE32-1AA0, 6SL3356-6TE32-6AA3, 6SL3350-6TK00-0BA0, 6SL3356-3AE32-6AA0, 6SL3356-6TE33-1AA3, 6SL3350-6TK00-0BA0, 6SL3356-3AE33-1AA0, 6SL3356-6TE35-0AA3, 6SL3350-6TK00-0BA0, 6SL3356-3AE35-0AA0, 6SL3356-6TE36-1AA3, 6SL3350-6TK00-0BA0, 6SL3356-3AE36-1AA0, 6SL3356-6TE38-4AA3, 6SL3350-6TK00-0BA0, 6SL3356-3AE38-4AA0, 6SL3356-6TE41-0AA3, 6SL3350-6TK00-0BA0, 6SL3356-3AE41-0AA0, 6SL3356-6TE41-4AA3, 6SL3350-6TK00-0BA0, 6SL3356-3AE41-4AA0, 6SL3356-6TG31-0AA3, 6SL3350-6TK00-0BA0, 6SL3356-3AG31-0AA0, 6SL3356-6TG31-5AA3, 6SL3350-6TK00-0BA0, 6SL3356-3AG31-5AA0, 6SL3356-6TG32-2AA3, 6SL3350-6TK00-0BA0, 6SL3356-3AG32-2AA0, 6SL3356-6TG33-3AA3, 6SL3350-6TK00-0BA0, 6SL3356-3AG33-3AA0, 6SL3356-6TG35-8AA3, 6SL3350-6TK00-0BA0, 6SL3356-3AG35-8AA0, 6SL3356-6TG38-1AA3, 6SL3350-6TK00-0BA0, 6SL3356-3AG38-1AA0, 6SL3356-6TG41-0AA3, 6SL3350-6TK00-0BA0, 6SL3356-3AG41-0AA0, 6SL3356-6TG41-3AA3, 6SL3350-6TK00-0BA0, 6SL3356-3AG41-3AA0, 6SL3357-6TE35-0AA3, 6SL3350-6TK00-0BA0, 6SL3357-3AE35-0AA0, 6SL3357-6TE37-4BA3, 6SL3350-6TK00-0BA0, 6SL3358-3AE37-4BA0, 6SL3357-6TE38-4AA3, 6SL3350-6TK00-0BA0, 6SL3357-3AE38-4AA0, 6SL3357-6TE41-2BA3, 6SL3350-6TK00-0BA0, 6SL3358-3AE41-2BA0, 6SL3357-6TE41-7BA3, 6SL3350-6TK00-0BA0, 6SL3358-3AE41-7BA0, 6SL3357-6TG34-2BA3, 6SL3350-6TK00-0BA0, 6SL3358-3AG34-2BA0, 6SL3357-6TG35-8AA3, 6SL3350-6TK00-0BA0, 6SL3357-3AG35-8AA0, 6SL3357-6TG37-3BA3, 6SL3350-6TK00-0BA0, 6SL3358-3AG37-3BA0, 6SL3357-6TG41-3AA3, 6SL3350-6TK00-0BA0, 6SL3357-3AG41-3AA0, 6SL3357-6TG41-3BA3, 6SL3350-6TK00-0BA0, 6SL3358-3AG41-3BA0, - 19 -
Page 20
Sinamics__________________________________________________________________________________________Author: I DT LD I D11, A.MeyerStatus: July. 2012A5E02891217A- 20 -
Previous : A5E37764770, 6SR0960-0CC21-0AD0 Siemens Robicon NXGpro DCR 21 Cell GH180 NXGpro controller 21 cell
Next : LDZ10506540, A1A0100502, 6SR4900-0JM01-2AD0, Siemens G4 G5 CELL FUSE


 Copy product links
 Long by picture save/share
INQUIRY


Add Successfully
We are the world's leading supplier of spare parts for medium voltage drives of various brands

点击右上角
分享给朋友吧
GET IN TOUCH

East Sun Industrial Centre, No 16 Shing Yip Street Kl, Hongkong

Call us : +852 5261 7322

Email us : [email protected]
SITEMAP
BUSINESS HOURS
Monday to Friday : 9 am to 6 pm
Saturday : 9 am to 12 am
Sunday : Closed Support Hours in 24/7 Everyday
DISCLAIMER:
We are not an authorized distributor, reseller or representative of the following products presented on this website. All Product names and logos throughout this site are trademarks of their respective holders. Use of them DOES NOT imply any affiliation with or endorsement by them.
© 2020 robiconperfectharmony.com site . All rights reserved Site Map
